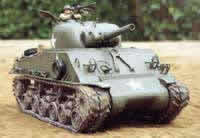
Building Tamiya's 1:16 R/C M4 Sherman Tank
| | Follow
TankZone's step by step guide on building Tamiya 1:16 scale radio control full
option Sherman Tank. This is our speciality. Our hints and tips gleamed through
building many of this and similar tanks for satisfied customers could save you
time and help avoid costly mistakes. Email if you have come across a problem not
covered here and we will share it with other enthusiasts. Watch out for our other
guides to building the Tiger 1E and the latest M26 Pershing. |
Packaging
and Contents
 Top of flap
 |
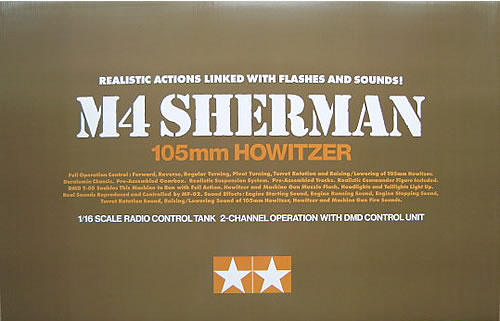
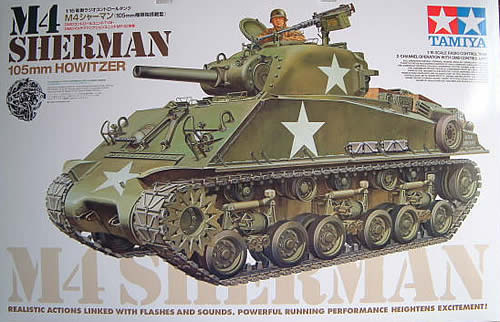
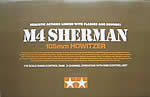
 Illustrated box cover with
windows
Illustrated box cover with
windows | 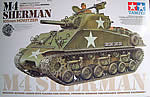 Underside of flap
 |
The model
kit comes in a high quality, beautifully illustrated box x by y by z mm weighing
over 10kg. It has a built-in carrying handle so that you can lug it home double-quick
without breaking your arms. The velcroed front flap opens to reveal the main parts
inside displayed behind clear plastic cut-outs. It's almost a shame to have to
open it to get at the goodies inside.
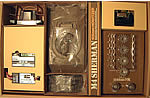 | |
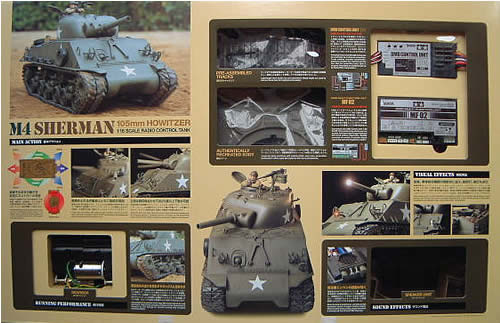
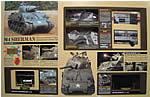
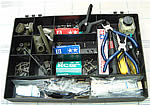
Once opened, all
the parts are nicely laid out. On the left you have the speaker box above the
DMD controller and multi-function unit. The main model itself including the upper
hull and turret assemblies is to the right. The metal lower hull is underneath.
Next to this is a long box containing all the other electronic parts, metal suspension
parts, screws and bolts and all the odds and bits. To the right, you have the
twin motor and gearbox on top of the main metal running gear. |
Preparation Before
you jump in head first and start gluing and screwing things together. Here are
a few things you should do that will pay big dividends later.
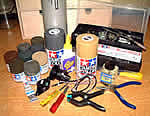 | |
Firstly, find a
clear work area and have all the tools readily within reach. You will need: a
side cutter, a pair of sharp nose pliers, a sharp craft knife, a fine file, assortment
of screw drivers (Ripmax do a good set for £4.99), a set of clamps, liquid
poly (plastic glue) and cyanoacrylate (super glue). Ceramic grease and liquid
thread lock is provided with the kit. Anything else is secondary or extra. Tips:
Have the metal primer and at least three cans of US Army olive drab spray paint
ready. It's easier to spray some parts first before assembly and then apply a
thin coat of over spray afterwards. |
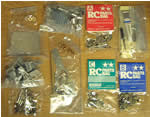
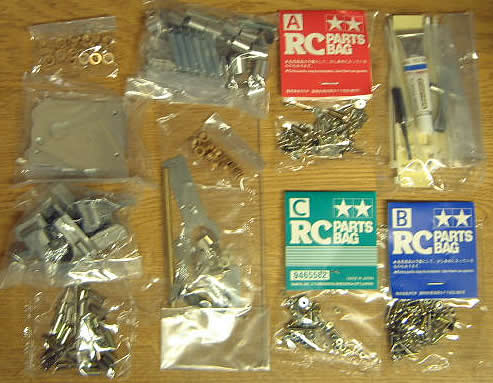
| | Tips:
Invest in a multi-compartment plastic organiser tray, preferably with a lid, from
your local DIY shop to put all the loose bits in. You'll find it save you so much
time and frustrations in the long run not having to look for missing bits. When
you remove the parts from the packaging, put them separately in different compartments
in your tray. This is especially important for the three bags of screws and nuts
labelled A, B and C. Remember which is which. Better still label the compartments
accordingly. As you open the other bags, put them into separate compartments. Tips:
Make sure at least one of the screw drivers is magnetic - for picking up small
screw and nuts from the said tray. Tips:
When working with small parts, have a contrasting surface which helps you
find them easily. I found having a sheet of white paper before me to work upon
is useful for most parts. | You
are now ready to start assembly. Prime
Metal Parts
| 
| |
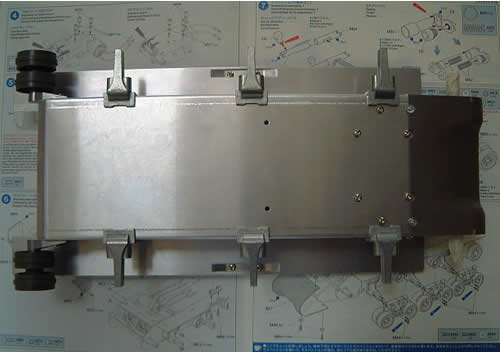
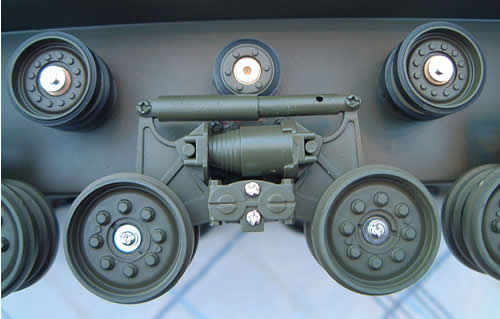
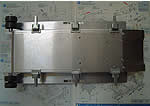
The six metal suspension
armatures are fitted onto the lower metal chassis with the screw provided. Apply
plenty of liquid thread lock to make sure it doesn't work loose. The two sets
of rear idler wheels are also fitted at this point. These are adjustable and should
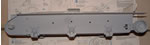
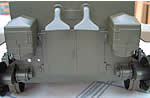
not be fixed. At
this point, the detail parts on the rear panel is assembled and attached to the
metal chassis using super glue. The
outside exposed part of the whole assembly is then primed with a suitable spray
primer along with all the other main metal parts like the sprockets and the suspension
assemblies. I use grey primer from Halfords. They are just as good, cheaper and
do not damage plastic parts if they can't be avoid being sprayed together. Smaller
metal parts can be primed by hand using a suitable brush. Leave
the primer to dry for the recommended time. I would also spray the main chassis
at this point in overall olive drab. The reason for this is explained in the next
section. | Return
Rollers
| 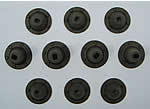
 
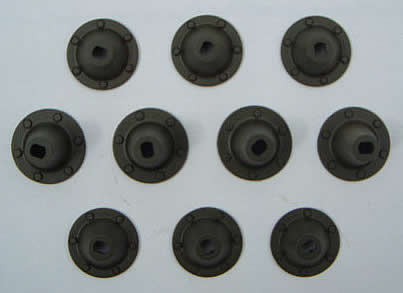
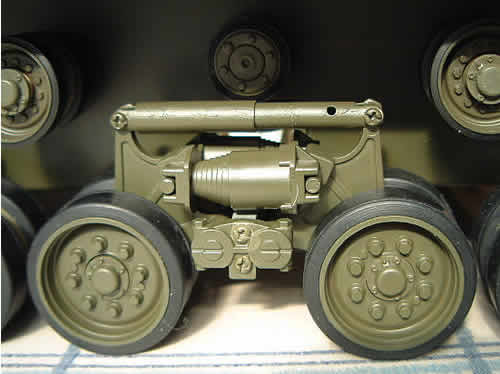
| | The
Sherman has five sets of return rollers either side; three small and two large.
The rubber that is meant to be on them is moulded in plastic. They don't have
separate rubber treads like for the main road wheels. Therefore to make them realistic,
the wheels should first be sprayed in olive drab. When dry, paint the rubber on
by hand using Tamiya's matt black acrylic paint. The
wheel hubs and wheel caps should also be sprayed in olive drab at the same time
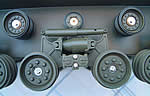
as the wheels. Tips:
Important - Make sure you fit and secure the forward-most return roller on
both side first before mounting the gearboxes as they do not leave big enough
gaps to allow you to put the nuts on afterward. I learned this lesson the hard
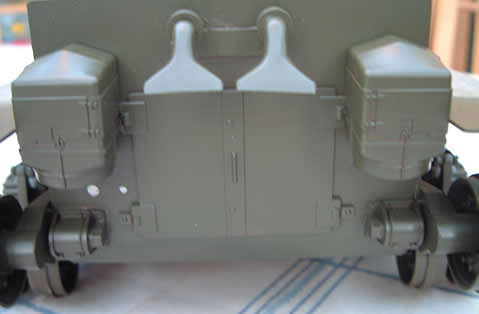
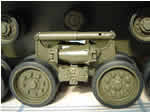
way! You
may now proceed to fit the gearboxes and complete the front of the lower hull.
I have primed the extending side plates before-hand. The gearboxes and the inside
of the chassis should now be masked using suitable tape and paper before the unpainted
parts are sprayed in overall olive drab. Don't forget to mask the front-most pair
of return rollers else the carefully painted on tyres will be over-sprayed. After
the paint has dried, the rest of the return rollers can be fitted. Make sure you
apply grease to the spindles during fitting of the return rollers to allow free
movement and secure the nuts using liquid thread lock. |
Suspension
Arm and Road Wheels Assembly
 | |
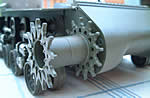
The three pairs
of suspension arm and road wheel assembles are assembled separately away from
the main chassis, primed and sprayed in olive drab (including the screws) before
they are attached to the receiving armature on the main chassis. The rubber tyres
can be added after the suspensions and road wheels have been attached. Add
main drive sprockets to gearboxes and rubber tyres to rear idler wheel. The lower
hull assembly is now complete. The aerial fittings are left in their original
colour as they are not really part of the model.
| More
later - Watch this space!
We
don't just sell you the kit, we can build them for you as well. Want
one of these fantastic tanks? Don't have the time? Want one as a special present
for a loved one? We can supply the model kit, build it to a high standard and
deliver it to you in a ready to run condition. This page will give you some idea
how we go about this. Email
us for more details.
|
|